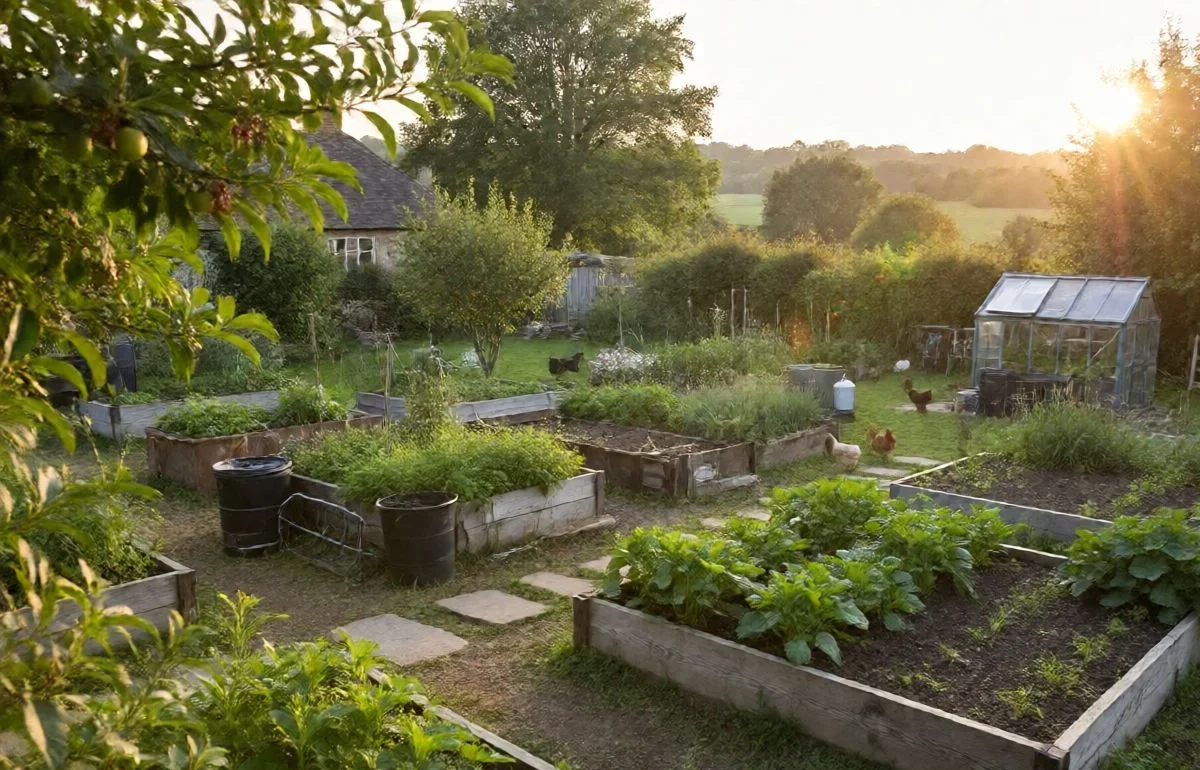
Are you ready to grow your own fresh vegetables and enjoy the satisfaction of homegrown food? Homestead gardening is a simple way to start living more sustainably and save money on groceries.
Even if you’ve never planted a seed before, you can create a thriving garden right in your backyard. This guide will walk you through the basics, so you can watch your garden grow and enjoy the rewards. Keep reading to discover easy steps that will turn your outdoor space into a productive and beautiful garden.
Your journey to fresh, healthy food starts here.
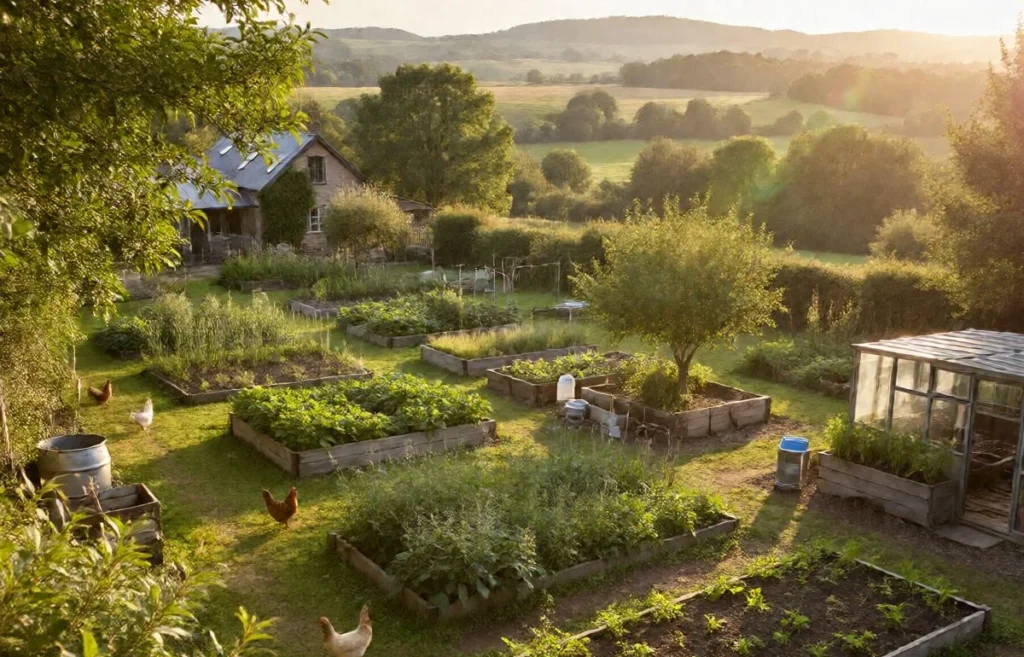
Choosing The Right Location
Starting a gardening homestead requires careful planning, especially when choosing the right location. This step is key for homestead gardening for beginners because it affects plant growth and garden success. Picking the best spot helps plants get enough sunlight, good soil, and easy water access. These factors make garden homesteading easier and more productive. Understanding how to select a location saves time and effort in the long run. This guide shares essential gardening starter tips on finding the perfect place for your homestead garden.
Sunlight Needs
Plants need sunlight to grow strong and healthy. For homestead gardening, most vegetables and flowers require at least 6 to 8 hours of direct sunlight each day. Choosing a spot with full sun helps plants produce more food and bloom better.
- Full sun: 6 to 8 hours of direct sunlight.
- Partial sun: 4 to 6 hours of direct sunlight.
- Shade: Less than 4 hours of direct sunlight.
Keep these points in mind when checking sunlight:
- Observe the area at different times of the day.
- Note any shadows from buildings, trees, or fences.
- Choose a spot that stays sunny for most of the day.
Some plants tolerate partial sun, but most crops in garden homesteading thrive best in full sun. Using a sun chart helps track sunlight hours. This simple table shows common plants and their sunlight needs:
| Plant | Sunlight Requirement |
|---|---|
| Tomatoes | Full sun |
| Lettuce | Partial sun |
| Carrots | Full sun |
| Spinach | Partial sun |
Choosing a sunny location is a top gardening starter tip for homestead gardening beginners.
Table of Contents
Soil Quality
Good soil is the foundation of a healthy gardening homestead. Soil quality affects how well plants absorb nutrients and grow. Test your soil before starting your garden homesteading journey. Knowing soil type and nutrients helps you prepare the garden bed properly.
Important soil factors include:
- Texture: Loamy soil is best for most plants because it holds water and drains well.
- pH level: Most vegetables prefer soil with a pH between 6.0 and 7.0.
- Nutrients: Nitrogen, phosphorus, and potassium are essential for plant growth.
Use a simple soil test kit to check pH and nutrient levels at home. Adding compost or organic matter improves soil quality and structure. Here is a quick soil improvement checklist for homestead gardening beginners:
- Remove weeds and debris from the site.
- Loosen the soil with a garden fork or tiller.
- Add compost or aged manure to enrich the soil.
- Mix in sand or peat moss if the soil is too heavy or clay-like.
- Test soil pH and adjust with lime (to raise pH) or sulfur (to lower pH) if needed.
Healthy soil helps plants resist pests and produce bigger harvests. Soil quality is a major factor in gardening starter tips for any homestead gardening for beginners.
Water Access
Water is vital for plants to survive and grow. Choosing a garden location near a water source makes watering easier and saves effort. Garden homesteading needs a steady water supply for daily or weekly irrigation.
Consider these points about water access:
- Place your garden close to a faucet, rain barrel, or well.
- Check water pressure and flow to ensure it meets garden needs.
- Use drip irrigation or soaker hoses to deliver water efficiently.
- Collect rainwater to reduce water costs and conserve resources.
Planning water access reduces the chance of plants drying out. In hot or dry climates, easy watering becomes even more important. For homestead gardening beginners, setting up a simple watering system saves time and keeps plants healthy.
Here is a basic water management table useful for gardening starter tips:
| Water Source | Pros | Cons |
|---|---|---|
| Garden faucet | Convenient, steady supply | May require hose or irrigation setup |
| Rain barrel | Free water, eco-friendly | Limited supply, depends on rainfall |
| Well water | Good for large gardens | Setup cost, needs pump |
Choosing a garden spot with good water access is essential for successful homestead gardening.
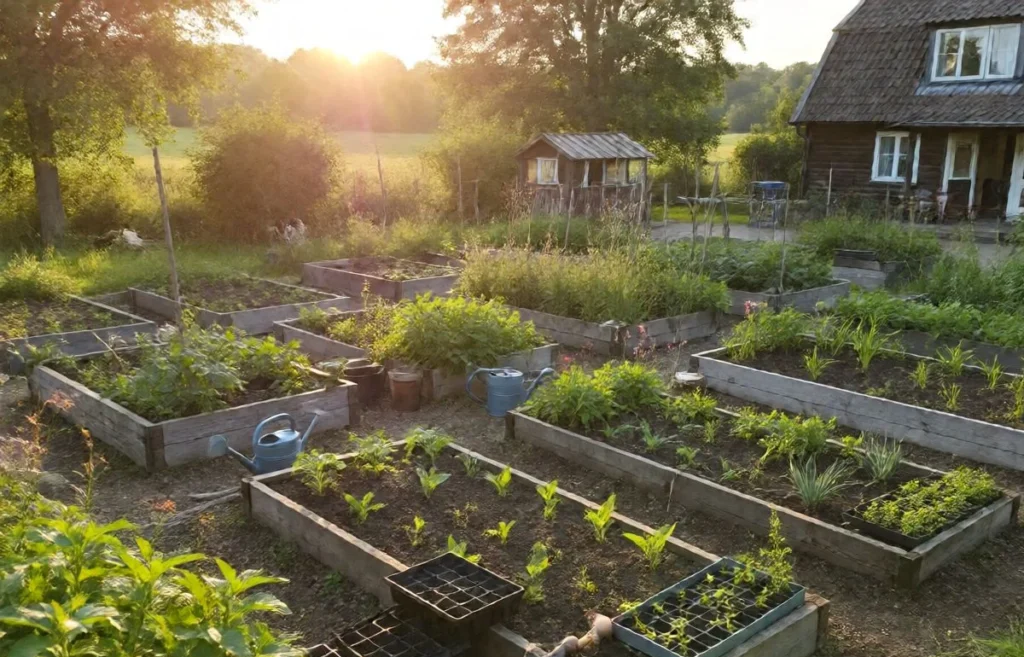
Planning Your Garden Layout
Starting a homestead gardening for beginners project means careful planning of your garden layout. A well-planned garden helps plants grow better and makes gardening easier. Planning your garden layout involves deciding the size of your garden, where to place crops, and how to create paths for easy access. These steps set a strong base for successful garden homesteading.
Garden Size
Choosing the right garden size is important for gardening starter tips. A garden that is too big can be hard to manage, especially for beginners. A small garden is easier to maintain and helps you learn the basics without feeling overwhelmed.
Consider these points when deciding your garden size:
- Available space in your yard or homestead.
- Time you can spend on gardening each day or week.
- Number of people you want to feed with your garden.
- Types of plants you want to grow.
Here is a simple table to help decide garden size based on your goals:
| Goal | Garden Size | Notes |
|---|---|---|
| Try gardening for fun | 50-100 sq ft | Small space to learn basic skills |
| Feed a small family | 200-400 sq ft | Enough for vegetables and herbs |
| Grow for storage or sale | 500+ sq ft | Requires more time and care |
Start small and expand your garden as you gain experience in gardening homestead.
Crop Placement
Planning crop placement is key in homestead gardening. Proper placement helps plants get enough sunlight, water, and nutrients. It also saves space and reduces pest problems.
Follow these gardening starter tips for crop placement:
- Group plants by sunlight needs. Place sun-loving plants in the sunniest spots.
- Put tall plants where they won’t block light. Place corn or sunflowers on the north side of the garden.
- Use companion planting. Some plants grow better next to each other. For example, tomatoes and basil.
- Rotate crops each year. This keeps the soil healthy and reduces pests.
- Plan for plant size. Leave enough space for each plant to grow.
Here is an example of grouping plants by sun needs:
| Sunlight Need | Example Crops |
|---|---|
| Full Sun (6+ hours) | Tomatoes, peppers, cucumbers |
| Partial Shade (3-6 hours) | Lettuce, spinach, kale |
| Shade (less than 3 hours) | Herbs like mint, chives |
Good crop placement makes your garden healthier and easier to care for during garden homesteading.
Pathways And Access
Creating clear pathways is important in homestead gardening for beginners. Paths let you reach your plants without stepping on the soil. This helps keep the soil loose and healthy.
Consider these tips for pathways and access:
- Make paths wide enough. A 12-18 inch wide path allows easy walking and tool use.
- Use mulch or stones. This keeps paths dry and clean.
- Plan paths for easy watering. Paths should let you reach all plants with a hose or watering can.
- Place paths to divide your garden into sections. This helps organize your crops and care routine.
- Keep paths straight or gently curved. This saves space and looks neat.
Here is a simple example of a garden with pathways:
[Bed 1] Path [Bed 2] Path [Bed 3] ----------------------------------- [Bed 4] Path [Bed 5] Path [Bed 6] Paths help with easy access, reduce damage to plants, and make gardening tasks faster.
Selecting Plants For Beginners
Starting a homestead gardening for beginners journey can feel exciting and a bit overwhelming. Choosing the right plants sets the stage for success. Selecting plants for beginners means picking those that grow easily, need less care, and give good results. This helps build confidence and keeps motivation high. In garden homesteading, the right plants make your garden productive and enjoyable. Focus on plants that match your local climate, soil, and sunlight. Keep the list simple and manageable. This article shares tips for picking easy vegetables, herbs, and understanding companion planting. These gardening starter tips create a strong foundation for your homestead gardening adventure.
Easy-to-grow Vegetables
Choose vegetables that sprout quickly and resist pests. These plants require less attention, perfect for new gardeners. Here are some reliable options for a successful start:
- Radishes: Fast-growing, ready in about 30 days.
- Lettuce: Grows well in cool weather and partial shade.
- Green beans: Need warm soil and produce plenty of beans.
- Zucchini: Very productive and easy to care for.
- Carrots: Require loose soil and steady moisture.
These vegetables fit well into a small garden and give quick rewards. Here is a simple table summarizing their needs:
| Vegetable | Sunlight | Soil Type | Days to Harvest |
|---|---|---|---|
| Radishes | Full sun | Well-drained | 30 |
| Lettuce | Partial shade | Rich, moist | 45 |
| Green beans | Full sun | Loamy | 50-60 |
| Zucchini | Full sun | Rich, well-drained | 45-55 |
| Carrots | Full sun | Loose, sandy | 70-80 |
Start small with these vegetables to build skills and enjoy fresh produce. They suit gardening homestead projects well.
Herbs For Beginners
Herbs add flavor to meals and boost garden diversity. Many herbs are forgiving and grow quickly. These traits make them ideal for homestead gardening novices. Try growing these easy herbs:
- Basil: Loves warm weather and sun.
- Mint: Spreads fast, so plant in containers.
- Parsley: Grows in sun or partial shade.
- Chives: Hardy and require little care.
- Cilantro: Prefers cool weather and well-drained soil.
Herbs need less space and can thrive in pots or garden beds. Here is a quick guide to help you plan:
| Herb | Light | Water | Notes |
|---|---|---|---|
| Basil | Full sun | Moderate | Pinch leaves to encourage growth |
| Mint | Partial shade | Regular | Contain roots to prevent spreading |
| Parsley | Sun or partial shade | Consistent | Slow to start but grows steadily |
| Chives | Full sun | Low to moderate | Cut back regularly for fresh growth |
| Cilantro | Partial shade | Moderate | Best in cooler seasons |
Growing herbs supports garden homesteading by providing fresh ingredients. They also attract helpful insects and improve soil health.
Companion Planting Basics
Companion planting means growing certain plants near each other for benefits. This practice improves growth, reduces pests, and saves space. For homestead gardening for beginners, it is a simple way to boost success. Learn some easy companion planting tips below.
Good companion pairs include:
- Tomatoes and basil: Basil repels pests and improves tomato flavor.
- Carrots and onions: Onions mask carrot smell, keeping pests away.
- Corn, beans, and squash: Known as the “Three Sisters,” they support each other’s growth.
- Cucumbers and radishes: Radishes deter cucumber beetles.
Here are some quick companion planting rules:
- Plant herbs near vegetables for pest control.
- Avoid planting crops that need different soil conditions together.
- Use tall plants to provide shade for shade-loving ones.
- Rotate plant families each year to keep soil healthy.
Companion planting saves time and effort, key for gardening starter tips. It makes your garden homestead more productive and natural.
Preparing The Soil
Starting a garden on your homestead requires good soil preparation. Soil is the foundation of healthy plants and a bountiful harvest. In homestead gardening for beginners, preparing the soil well sets your garden up for success. Understanding your soil’s condition, making changes to improve it, and using mulching techniques are key steps in gardening homestead. These steps help your plants grow strong and keep your garden thriving season after season.
Soil Testing
Testing your soil is the first step in preparing your garden homestead. It tells you what nutrients your soil has and what it lacks. Knowing your soil’s pH level and nutrient content helps you choose the right amendments for better plant growth.
There are simple soil testing kits available for home use. These kits measure:
- pH level (how acidic or alkaline the soil is)
- Levels of nitrogen (N), phosphorus (P), and potassium (K)
- Presence of other minerals
For more detailed results, you can send a soil sample to a local extension service or lab. Follow these steps for soil testing:
- Collect soil from different spots in your garden homestead.
- Mix the samples in a clean container.
- Take about 1 cup of this mix for testing.
- Use a test kit or send the sample to a lab.
Here is a simple table to understand soil pH and its effect on plants:
| pH Range | Soil Type | Plant Growth |
|---|---|---|
| Below 5.5 | Acidic | Poor nutrient availability |
| 6.0 – 7.0 | Neutral | Best for most plants |
| Above 7.5 | Alkaline | Some nutrients locked up |
Soil testing is a smart gardening starter tip. It saves time and money by guiding your soil improvement efforts.
Amending Soil
After testing, amending soil improves its texture, fertility, and drainage. This step is important in gardening starter tips for any homestead gardening project.
Common soil amendments include:
- Compost: Adds organic matter and nutrients.
- Lime: Raises soil pH for acidic soils.
- Sulfur: Lowers pH for alkaline soils.
- Sand: Improves drainage in clay soils.
- Peat moss: Increases moisture retention.
Use these steps to amend your soil:
- Clear the garden area of weeds and debris.
- Spread the chosen amendments evenly over the soil.
- Mix amendments into the top 6-8 inches of soil using a shovel or tiller.
- Water the area lightly to help amendments settle.
Here is a quick guide to soil amendment based on soil type:
| Soil Type | Problem | Recommended Amendment |
|---|---|---|
| Clay | Poor drainage, heavy texture | Sand, compost |
| Sandy | Dries quickly, low nutrients | Compost, peat moss |
| Acidic | Low pH | Lime |
| Alkaline | High pH | Sulfur, organic matter |
Proper soil amending helps your plants absorb water and nutrients better. This step is a must for successful homestead gardening for beginners.
Mulching Techniques
Mulching is a valuable gardening homestead practice. It covers the soil surface around plants with materials that protect and nourish the soil.
Benefits of mulching include:
- Keeping soil moist longer
- Reducing weed growth
- Preventing soil erosion
- Adding nutrients as mulch breaks down
- Regulating soil temperature
Common mulch materials for homestead gardening:
- Straw or hay
- Wood chips or bark
- Grass clippings
- Leaves
- Compost
Best mulching techniques:
- Clear weeds from the area before applying mulch.
- Apply a 2-4 inch layer around plants, leaving some space near stems.
- Replenish mulch each season as it decomposes.
- Avoid piling mulch against plant stems to prevent rot.
Mulching is a simple way to improve soil health and reduce garden chores. For homestead gardening for beginners, it’s one of the easiest steps to take.
Planting And Maintenance
Starting a garden on your homestead is exciting but requires care and attention. Planting and maintenance are key steps in homestead gardening for beginners. Good planting practices help seeds grow strong roots and healthy plants. Regular maintenance keeps your garden free from pests and diseases. It also ensures plants get enough water and nutrients. With proper care, your garden homesteading efforts will bring fresh vegetables and beautiful flowers. Understanding the basics of seed starting, watering tips, and weed control will make your gardening starter tips easier to follow and more successful.
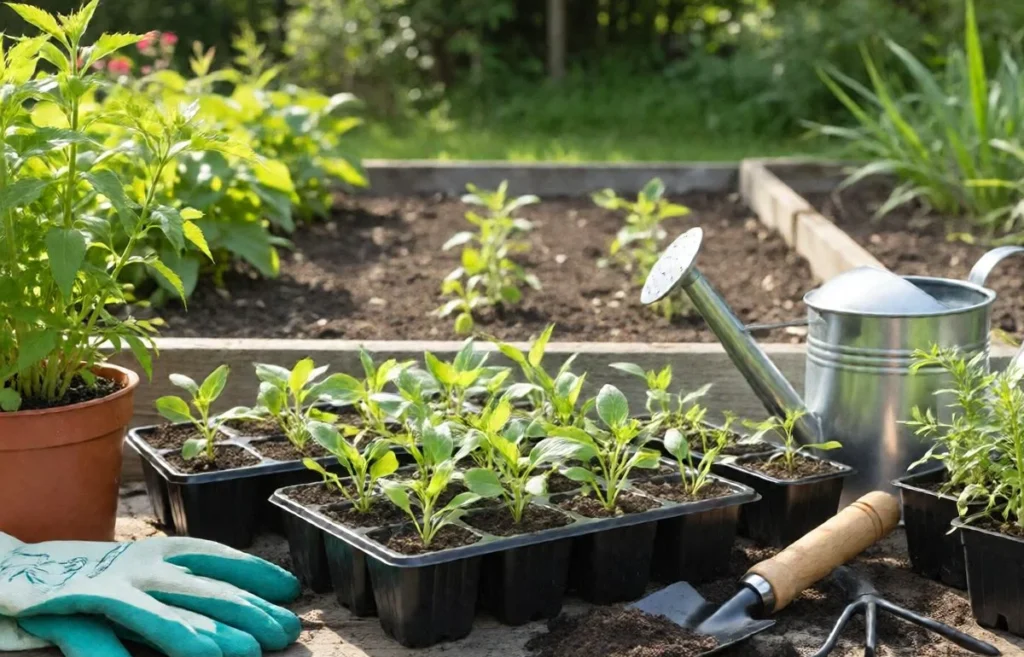
Seed Starting
Seed starting is the first step in gardening homestead success. Starting seeds indoors or directly in the soil depends on your climate and the type of plants. For beginners, starting seeds indoors gives better control over temperature and moisture. Use seed trays or small pots filled with quality seed-starting mix. Plant seeds at the depth mentioned on the seed packet.
- Keep soil moist but not soggy. Mist gently to avoid washing seeds away.
- Provide warmth. Most seeds need 65-75°F to germinate well.
- Use grow lights or place near a sunny window. Seedlings need 12-16 hours of light daily.
- Thin seedlings. Remove weaker plants to let strong ones grow.
Below is a simple table showing common seed starting times for popular garden vegetables:
| Vegetable | Start Indoors (weeks before last frost) | Direct Sow |
|---|---|---|
| Tomatoes | 6-8 weeks | No |
| Carrots | No | As soon as soil is workable |
| Lettuce | 4-6 weeks | Early spring or fall |
| Peppers | 8-10 weeks | No |
Following these seed starting steps helps build a strong garden homesteading foundation.
Watering Tips
Water is vital in any gardening homestead. Plants need enough water to grow but too much can harm roots and cause disease. Watering properly is part of homestead gardening for beginners. The best time to water is early morning or late afternoon. This reduces water loss from evaporation.
- Use a soaker hose or drip irrigation. These deliver water directly to roots and save water.
- Water deeply. Soak soil 6-8 inches deep to encourage deep root growth.
- Avoid wetting leaves. Wet leaves increase risk of fungal diseases.
- Check soil moisture. Stick your finger 1-2 inches into soil. If dry, it’s time to water.
Keep a watering schedule based on weather and plant needs. Young seedlings need more frequent watering than established plants. Mulching around plants helps retain soil moisture and reduces watering frequency.
Use this simple watering guide for common garden plants:
| Plant Type | Watering Frequency | Amount per Session |
|---|---|---|
| Vegetables | 3-4 times per week | 1 inch |
| Herbs | 2-3 times per week | 0.5 inch |
| Fruit trees | Once per week | 2 inches |
Weed Control
Weeds compete with your garden plants for nutrients, water, and sunlight. Controlling weeds is important in garden homesteading. Start with clean soil before planting. Remove all weeds and roots.
- Mulch garden beds. Use straw, wood chips, or grass clippings to block weed growth.
- Hand pull weeds regularly. Removing weeds early stops them from spreading seeds.
- Use a hoe or garden fork. Lightly till the soil surface to cut small weeds.
- Plant densely. Close planting shades the soil and reduces weed space.
Here is a quick comparison of weed control methods:
| Method | Effectiveness | Ease of Use | Cost |
|---|---|---|---|
| Mulching | High | Easy | Low |
| Hand Weeding | Medium | Moderate | Free |
| Hoeing | Medium | Moderate | Free |
Consistent weed control boosts plant health and garden yield. It is a must-follow gardening starter tip for homestead gardening success.
Pest And Disease Management
Pest and disease management is a key part of homestead gardening for beginners. Bugs and illnesses can damage plants, lower yields, and make gardening less fun. Understanding common pests, natural ways to control them, and steps to prevent problems keeps your garden healthy. This guide helps with gardening starter tips to protect your garden homesteading efforts without harsh chemicals.
Common Pests
Many pests can invade a gardening homestead. Knowing these pests helps identify issues early and take action fast. Here are some common pests to watch for:
- Aphids: Tiny green or black insects that suck plant juices. They cause curled leaves and sticky residue.
- Tomato Hornworms: Large green caterpillars that eat tomato leaves and fruit.
- Spider Mites: Small, spider-like bugs that create fine webs and yellow spots on leaves.
- Slugs and Snails: Slimy creatures that chew holes in leaves and fruits, often active at night.
- Whiteflies: Small white flying insects found on undersides of leaves. They weaken plants by sucking sap.
Here is a simple table summarizing the pests and their effects:
| Pest | Appearance | Damage |
|---|---|---|
| Aphids | Small, green or black | Leaf curling, sticky residue |
| Tomato Hornworms | Large green caterpillars | Leaf and fruit damage |
| Spider Mites | Tiny, spider-like | Yellow spots, webbing |
| Slugs and Snails | Slimy, slow-moving | Holes in leaves and fruits |
| Whiteflies | Small, white flying bugs | Weak plants, sap loss |
Natural Remedies
Natural remedies work well for garden homesteading. They keep pests under control without harming beneficial insects or the environment. Here are some easy natural pest control ideas:
- Neem Oil: Spray neem oil on plants. It repels and kills many insects like aphids and whiteflies.
- Insecticidal Soap: Use soap solutions to wash off soft-bodied pests gently.
- Hand Picking: Remove large pests like tomato hornworms by hand and drop them in soapy water.
- Companion Planting: Plant herbs like basil or marigold near vegetables. They confuse or repel pests naturally.
- Garlic Spray: A homemade spray of crushed garlic and water deters many insects.
Natural remedies protect your plants and support a healthy garden ecosystem. Try mixing different methods for better results.
Preventive Measures
Preventive measures reduce pest and disease problems before they start. Careful planning and regular garden checks help maintain a strong, healthy garden homesteading space. Follow these gardening starter tips for prevention:
- Choose Resistant Plants: Select plant varieties that resist common pests and diseases.
- Rotate Crops: Change plant locations each year to stop pests from building up in the soil.
- Maintain Healthy Soil: Add compost and organic matter to keep soil fertile and plants strong.
- Remove Debris: Clear dead leaves and plant waste to reduce places pests hide and breed.
- Water Properly: Water in the morning at the base of plants to avoid wet leaves that encourage disease.
- Inspect Plants Regularly: Look for early signs of pests or disease. Catching problems early makes control easier.
Taking these preventive steps builds a solid foundation for homestead gardening for beginners. A healthy garden resists pests and grows better with less effort.
Harvesting And Storage
Harvesting and storage are key parts of homestead gardening for beginners. Knowing when to pick your fruits and vegetables ensures the best taste and nutrition. Proper harvesting techniques help protect your plants and keep your garden healthy. Storing your produce correctly extends its life and reduces waste. These skills make garden homesteading more rewarding and help you enjoy your hard work longer.
When To Harvest
Timing matters in gardening homestead. Picking produce too early or too late can affect flavor and texture. Here are simple signs to know the right time to harvest:
- Color: Most fruits and vegetables change color when ripe. For example, tomatoes turn red or orange.
- Size: Check the expected size on seed packets or plant tags.
- Firmness: Gently squeeze produce. It should feel firm but not hard or mushy.
- Days to maturity: Count days from planting to harvest as a rough guide.
- Easy to pick: Ripe fruits often come off the plant easily with a slight twist or pull.
Here is a quick table for common garden crops:
| Crop | Harvest Indicator | Days to Maturity |
|---|---|---|
| Tomatoes | Full color and slightly soft | 60-85 |
| Green Beans | Firm, snap easily | 50-60 |
| Carrots | Bright orange, firm | 70-80 |
| Peppers | Full color, firm | 60-90 |
Following these simple tips helps beginners avoid common mistakes. Picking at the right time makes your homestead gardening for beginners efforts more successful.
Proper Harvesting Techniques
Using the right tools and methods protects plants during harvesting. It also keeps your produce fresh and undamaged. Here are key gardening starter tips for proper harvesting:
- Use clean tools: Sharp scissors or pruning shears reduce damage to plants.
- Harvest in the morning: Cool temperatures keep produce crisp and full of moisture.
- Handle gently: Avoid bruising fruits and vegetables by holding them carefully.
- Cut, don’t pull: Cutting stems reduces harm to the plant and encourages new growth.
- Harvest regularly: Picking ripe produce often helps plants keep producing.
For example, when harvesting leafy greens:
- Use scissors to cut outer leaves close to the base.
- Leave the inner leaves to grow for future harvests.
- Do not pull or uproot the entire plant.
These techniques improve yield and plant health. They make gardening homestead tasks easier and more enjoyable for beginners.
Storing Your Produce
Proper storage preserves freshness and nutrition after harvesting. Different crops need different storage methods. Here are important homestead gardening tips for storing produce:
- Cool, dry place: Root vegetables like potatoes and carrots last longer here.
- Refrigeration: Leafy greens, berries, and herbs need cold storage to stay fresh.
- Use breathable containers: Avoid plastic bags unless they have holes for air flow.
- Separate ethylene producers: Keep fruits like apples away from leafy greens to prevent early spoilage.
- Dry produce before storage: Moisture causes mold and rot, so gently dry vegetables before storing.
Here is a simple guide for storing common garden crops:
| Produce | Storage Method | Ideal Temperature |
|---|---|---|
| Carrots | In a cool, dark place or refrigerator | 32-40°F |
| Tomatoes | Room temperature, away from sunlight | 55-70°F |
| Leafy Greens | In perforated plastic bags in fridge | 32-36°F |
| Potatoes | Cool, dark, and dry place | 45-50°F |
Good storage extends your harvest and reduces waste. It supports successful garden homesteading and helps beginners enjoy their produce longer.
Frequently Asked Questions
What Is Homestead Gardening For Beginners?
Homestead gardening means growing food at home for your family. It is simple and helps save money. Beginners start with easy plants and small spaces.
How Do I Start A Homestead Garden?
Choose a sunny spot and prepare the soil well. Start with easy vegetables like tomatoes and lettuce. Water regularly and watch your garden grow.
What Plants Grow Best In A Beginner Garden?
Tomatoes, lettuce, carrots, and beans are good for beginners. These plants need little care and grow fast. They provide fresh food for your kitchen.
How Often Should I Water My Homestead Garden?
Water your garden about two to three times a week. Keep the soil moist but not soaked. Early morning is the best time to water plants.
What Tools Do I Need For Homestead Gardening?
Basic tools include a shovel, hoe, watering can, and gloves. These help with digging, planting, and watering. You don’t need many tools to start.
How Can I Keep Pests Away Naturally?
Use natural methods like handpicking bugs and planting herbs. Herbs like basil and mint repel harmful insects. Avoid chemicals to keep your garden safe.
How Long Does It Take To See Results In Homestead Gardening?
Most vegetables grow within 30 to 60 days. Leafy greens grow faster than root vegetables. Patience helps; your garden will improve over time.
Conclusion
Starting a homestead garden brings many rewards. You grow fresh food right at home. It saves money and helps the environment. Gardening teaches patience and care. Small steps lead to big results over time. Enjoy watching your plants grow each day.
Remember, anyone can start with simple tools. Keep learning and trying new things. This journey makes life more peaceful and healthy. Embrace the joy of growing your own food.